Showing posts with label quilt. Show all posts

Sunday, September 29, 2013

double-gauze quilt DONE

After a burst of productivity, I managed to knock out this fun project.


I love the super soft double-gauze top & have been enjoying using this on nights I end up crashing in Mr. Itty Bitty's room. I also really like how light it feels. I'm not loving the scratchy essex linen I used on the back. Ugh. I've washed the quilt twice and it is everything I dreamed in terms of wrinkly goodness but the back is still too itchy for my tastes. Won't be making that mistake again! 


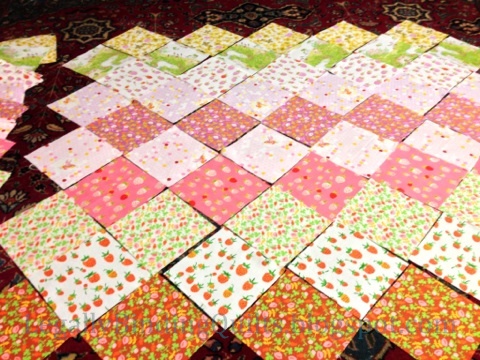
I have also found myself second guessing my decision to be so random with my fabric placement. I'm glad I did it because it definitely took me out of my comfort zone but I think I will forever be wondering if I shouldn't have made some fun pattern out of the greys, yellows & whites. Diagonal stripes? Herringbone? Arrows? On & on. I spend a lot of time looking at this quilt while rocking IB to sleep.  


Technicalities:
This quilt finished up 16 blocks wide by 17 blocks long, blocks were cut 6" square before being made into HST blocks.  Final size was approx 83.25" x 78.75" unwashed & 81.25" x 75.5" after washing. This was my first experiment with not prewashing my fabric & batting. 


I used a bamboo batting & I like how lightweight it is. 


I stuck to the stated plan for quilting- in the ditch diagonally to baste the batting onto the quilt top & then quilted diagonally across the blocks in the other direction after I attached the back. I didn't draw guides for my diagonal lines so they aren't perfectly straight but I really like how it turned out. 


As for the no-binding technique, I really like how it turned out! It was hard to get the backing to the exact size I needed for the front but once I did, it was pretty straightforward to sew it all around, turn it out & hand-stitch the opening closed. I had a couple of puckered spots on the back but I think that is because I didn't use any basting pins. They were easy enough to repair & I was worried about my pins snagging the delicate fabrics so no issues. 


So excited to have finished this one up! 


Thursday, September 19, 2013

Double-Gauze Top Complete!

Very excited to report that I've finished piecing & ironing my double-gauze quilt top AND I basted it onto the batting (a bamboo blend).


Since I'm trying a new no-binding technique (from here), my next step is attaching the batting to the top before I sew the backing on.


My plan for the quilting is to baste along the HST diagonals & then quilt a diagonal in the opposite direction through the squares. I'm worried that it will skew the quilt a little bit since it's going to be so one-directional at each stage. Fingers crossed it works!

Sunday, September 15, 2013

Sorting & Placing: Briar Rose Quilt A Loooong

So I have 20 fabrics, 21 6" squares. I think I"ll make my quilt 20x20, squares set on point. First I need to figure out what order I want my fabrics in & I want to make sure the size works.

this layout was purple, pink, red


Then I decided I like purple, red, pink better but this quilt only used 19 of the patterns; it was missing the orange calico (my least favorite pattern of the bunch...) I also didn't like having the 2 frog prints at the very top & very bottom. 

I think this is my best option. Orange calico & blue calico are touching & the colors kind of go purple, red, pink, orange, yellow, blue, green but I'm going with it. 

After a couple of false starts, I decided this is the layout I like the best. My squares are approx 8.5" on the diagonal so approx 8" finished (plus additional shrinking in the wash...). Checking my A squared plus B squared equals C squared, the diagonal should be 8.485. PERFECT. Looks like my 20x20 quilt will be 80" & then shrink in the wash. 

Top 

Middle 

Bottom

I didn't have enough room in my hallway to layout an entire 20x20 quilt & I needed to hustle because I spent too long deciding on color order so I tried to stack the blocks up tilted how I want them.  This meant tilting my strawberries in opposite directions and making sure that the vignettes were spaced out in the hex bee, nanny bee & frog pond prints. Hopefully I did it correctly because this is going to be one of those quilts where I don't notice these mistakes until it's almost finished. For some reason I'm having a lot of trouble keeping this quilts layout straight in my head... there's probably a lot of seam ripping in my future. 

Next up, sewing my rows. I stacked my blocks on point from left to right & numbered my rows from 1-20 (top to bottom). So my sewing will start at top left corner & end with bottom right corner. 

Wednesday, September 11, 2013

Double-gauze progress

My shiny new Briar Rose quilt has been distracting me but I haven't completely abandoned my double-gauze project.


It's been a long, complicated process trying to get all of the blocks laid out- and then making sure I keep track of how the blocks were laid out. 


I've finished almost 12 out of 17 rows (technically I've finished 9.5 rows & I have 2.5 more laid out just waiting to be sewn. 

Hopefully I will finish up soon because my Robert Kaufman Essex Linen (in steel) has arrived and it is so perfect. And I wanted this to be my summer quilt & summer's almost over!


Sunday, September 8, 2013

Cutting & Planning: Briar Rose Quilt World's Slowest Quilt-a-Looooong

Giving credit where due, this quilt is completely inspired by Made by Rae & based heavily on this project. OK now that that's out of the way, here's how mine is a bit different: 
  1. I'm planning to use every fabric in the line unless size gets completely out of control. I've done a little "A squared plus B squared equals C squared" in my head & I think the project will finish at a large full-sized quilt. 
  2. My blocks are going to be 6" squares & I did not wash fabric to preshrink. 
  3. I'm planning to do the no-binding technique Rae used on her original quilt.
  4. I'm going to change the fabric layout. Necessary because I will be using additional fabrics but also because I think the light pinks/purples blur together to much in the Windham project pics. 
So far I have ordered 1/2 a yard of every fabric (the *official* Briar Rose collectors pack from Heather Ross herself (squee!)). I've cut every fabric into 6" squares, so 21 squares of each fabric. Hopefully I'll end up with some extra squares for my little niece's quilt. 


only messed up cutting 5 blocks with my rotary cutter, not too bad given my skillz

As I've been cutting fabric, I've been doing a bit of issue spotting for the quilt. I am a little uptight about my pattern layouts so I'll have to decide what to do about tilting the blocks on the diagonal. Exhibits A & B: 

A

B

So Exhibit A was to illustrate the issue of trying to make sure this doesn't just look like a quilt turned on its side. I like for all of my patterns to be right side up but that's pretty much impossible since the squares are on point so I decided I would alternate which way the patterns were tilted. As I was testing this, I noticed a 2d issue with pattern placement- I wanted to alternate the frog vignettes, which I pretty well fixed in B. 

This may wind up being one of those quilts that I piece together by putting all the blocks out in order on the floor to make sure the patterns are lined up the way I like. Slow & steady. Next up, figuring out layout. Here's hoping Mr. Itty Bitty takes a nice long nap soon. 


Wednesday, August 7, 2013

This Isn't a Real Post, I Just Need to Remember the Plan

Look how far I've gotten on my double-gauze quilt! Time to start piecing my blocks together, but how? I had a moment of panic where I worried my HSTs & fabrics were too haphazard but I think once it's all together and washed it will lurve it. I tried a couple of different layouts & think I've found one I like.

Baby photobomb. Tee hee.

Getting a 2d opinion.

Awesome pin cushion I got from Etsy 4.5 years ago that I am still obsessed with.

Left

Center

Right


I only got 3 rows laid out before we had to do bedtime & I had to put them up. I hope I remember how I had them but if I don't, here's some pics of the plan! Quilt is going to be 16 wide x 17 long, blocks were originally cut 6x6, should finish up at 5" when quilt is assembled.

Tuesday, July 23, 2013

Scenes Around the Lady Workshop - Double-Gauze WIP

All of my fabric is in & cut so I am slowing piecing my squares together. Usually I fly through this part of a quilt but bitty baby is really slowing me down!
My fabric marker is almost dried up so I used good old No.2 pencil to mark my diagonals


Piecing my HST 2 at a time

Workstation

Need 272 blocks- oi!

Leftovers being saved for my future, girlier double-gauze project


Clain piecing as fast as I can- bitty baby isn't big on naps!


Progress!

Oops! Double-gauze is slippery to work with.

Ugh. Double-gauze is so stretchy. It's pretty tricky to work with. 


Thursday, June 13, 2013

One day I decided to make a quilt

Back in the day when I was just an attorney, I had time to play on the internet and read interesting things and I read this 3 year old (at the time) blog post. So I decided I would make a quilt. At that time, when not interneting, I also had time to take on random, frivolous, expensive, time-consuming projects. I've been sewing for as long as I can remember and had made a little hand-tied quilt in college (more on that later) but I had never made a blanket at this level. And by "at this level", I mean that can withstand being washed in a washing machine. 

As a lifelong fabric hoarder, I knew that fabric was the key to my success. Of course nothing I already owned would work; I decided that I had to use the practically obsolete Heather Ross Mendocino from the blog post, because I love mermaids, and to use P. Kaufmann Treasure Island backing fabric, because I love pirates. I'm a creative genius. 

Enough chat, here she blows: 
This quilt is actually kind of funny to me because brown & orange are 2 of my least favorite colors

I didn't square up my squares but overall I think it turned out pretty well, if I do say so myself. It took me one or two weekends to finish but it took me a couple of weeks to gather up all of my fabrics. Looking at the picture details, I appear to have finished it in early November 2011. Finished size is 61.5x50.5. I bound it with a scrappy binding because I used so many fabrics in the quilt top I couldn't decide what direction I wanted to go with a binding. I really like how it turned out! Since I didn't want to waste a single scrap of my Heather Ross, I put a scrappy strip across the back. The internet has since taught me that I was improv/slab piecing to make that strip. 

Planning my binding

Scrappy back

This was my first time attempting to quilt anything so I wasn't sure what to expect. I sew on a 12 year old Singer 7468 and didn't have a walking foot or a darning foot at the time. Actually, I don't even think I knew what those were. I ended up using orange thread and quilting (mostly) in the ditch along the zigzags. I thought that I would go back and quilt on either side of the ditch as well but I quickly tired of zigging and zagging- I just wanted to finish my quilt and sit under it while I watched Gossip Girl!

Awesome swim ladies, mangled looking crabs
The coral/orange polka dots turned out to be one of my favorites on the quilt
First of many doggie photobombs

Disfigured mermaids
I'm pretty pleased with how well I lined up the plaid *pats self on back*

My favorite part of making this quilt had to be picking the different fabrics and trying to match everything together. Obviously my jump-off was Mendocino but I added 5 more fabrics plus the backing once all was said and done. Mixing and matching is still my favorite part of quilting. 

Looking back on it, my next zig zag quilt will be made using this technique. I love working with HST in general but I don't like how mismatched my fabric patterns turned out. Live and learn! I've come a long way since this quilt and now that my quilt numbers have reached double-digits, I've decided to start sharing my experiences on the internet. Maybe one day I will even inspire someone to make a quilt.